8 Easy steps to organize a successful exhibition
Planning and executing any event — especially a successful trade show, convention, or exhibition — is not easy. It requires careful forethought, a high level of organization, grit, and a bit of luck.
The event could be as small as a solo art exhibition at a cafe, a local trade show exhibit, or a large-scale international expo. No matter the type of event or the size, following the simple steps below can ensure that your next exhibition will be top-notch, world-class, and one-of-a-kind.
Step 1: Have the Right Team
First, you’ll need a solid, reliable group of fellow organizers. Event planning in general is rarely a one-person job; two heads are better than one. It’s essential that you enlist the help and expertise of like-minded professionals way ahead of time. This will not only save you time and money in the long run, but it will also ensure that everything goes as smoothly as possible.
Step 2: Calculate your budget and time
The right team will depend on the overall time and money you’re willing to invest. Create a few spreadsheets, get out your calculator, and start scribbling. Factor in all the potential costs associated with your upcoming event and map out some realistic dates and deadlines. Keep in mind that — no matter how big or small your exhibition is — you’ll want to work out all the pricing and scheduling details for well-before, during, and after the event itself. Don’t forget to allow for a certain margin of error.
Step 3: Find the Right Venue
When your team, budget, and dates are good to go, it’s time to secure an exhibition venue. The right exhibition space will depend on the nature of your event (and your budget). Envision what your event might actually look like — and then start reaching out to local exhibition halls, hotels, co-working spaces, theaters, cafes, city officials, and so on. Having a memorable location to curate your exhibition is a key factor; be creative. Think about a suitable space for your products, artwork, and attendees.
Consider all the details such as accessibility, capacity, safety, climate control, catering, view/decorations, and so on. Be sure to make thorough in-person evaluations before settling on a venue.
step 4: reach out to brands, vendors, and talent
Next, it’s time to start networking. If you’re hosting a smaller scaled event, this step will be relatively straightforward. But if you’re organizing something larger scale, you’ll need to meet, greet, and mingle often. Reach out to potential businesses, talent, and anyone else that can benefit from your event. Get people interested. Think about your demographics, your target audience, and lead generation. In short, ask yourself: who is this exhibition for?
Also remember that while digital communication is vital, a face-to-face meeting can often make all the difference in getting people involved. A great way to enhance any exhibition is to invite some entertainment and/or a few keynote speakers too.
step 5: Generate buzz for your event
Once you know exactly who’s taking part in your exhibition, start getting the word out. Consult your team, devise a marketing plan, and make your marketing strategy clear to everyone involved. Your vendors, artists, etc. will surely help raise overall brand awareness for their goods and services. However, your focus should be generating buzz for the actual exhibition itself. Digital marketing, press releases, and social media posts are all highly effective methods here. But more traditional means — business cards, flyers, posters, billboards, and word-of-mouth — can go a long way too. So network and be creative. Work together towards a common, mutually beneficial goal. The more people involved and invested in your exhibition’s success, the farther its overall reach will be.
step 6: work out all the final logistics
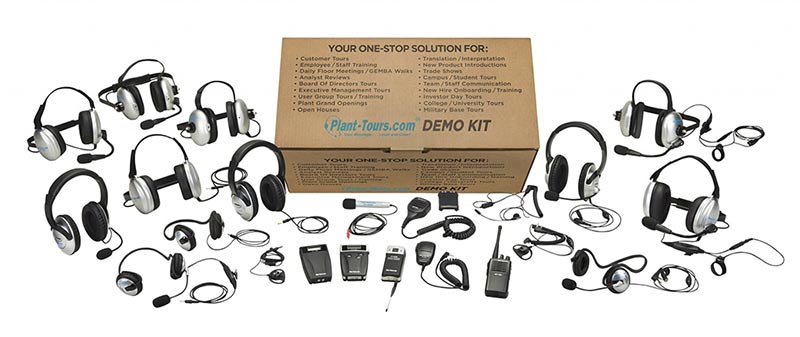
Once the word is out, you’ll want all the little technical and logistical bits fine-tuned. Depending on your event, you’ll need to answer several varying questions. What are the seating arrangements? Will there be refreshments? Is there free parking? Think about the floor plan, accessibility, stand design, and signage for your vendors. Assess things like lighting, wifi connectivity, and noise levels. For example, if your exhibition might get particularly loud, consider extra signage, microphones, and communication headsets. If it’s a large space, invest in audio and visual equipment like speakers and monitors. Compile a checklist based on the steps above — and start crossing things off. Be sure to keep an open line of communication, because you want everyone to be on the same page.
step 7: have a plan b
No matter how prepared everyone is, things might not always go according to plan. Vendors might cancel or pull out on short notice. There may be last-minute technical or logistical changes with the budget, the space, and/or the scheduling. Or the wifi may be down. In short, while it’s impossible to predict how exactly things will go, it helps to have a backup plan (for each of the above steps). Consider purchasing insurance. Have a list of contacts for possible replacements and last-minute adjustments. In general, be prepared to improvise, go with the flow, and/or roll with the punches.
step 8: end on a good note
Whether your exhibition goes off without a hitch, or if there are a few bumps along the way — never underestimate the power of forward-thinking. In other words, make sure that everyone involved feels content at the end of the day. This includes your team, your vendors, the artists, the staff, and the public.
Send a few personalized emails, prepare some gift packages, and maybe even host a dinner or gala to express your gratitude. Follow up with both the exhibitors and the attendees. Share some highlights, metrics, and encouraging statistics, and make sure that your event remains memorable. This will not only ensure that your exhibition is indeed a success, but it will also help make your next event one to look forward to.


